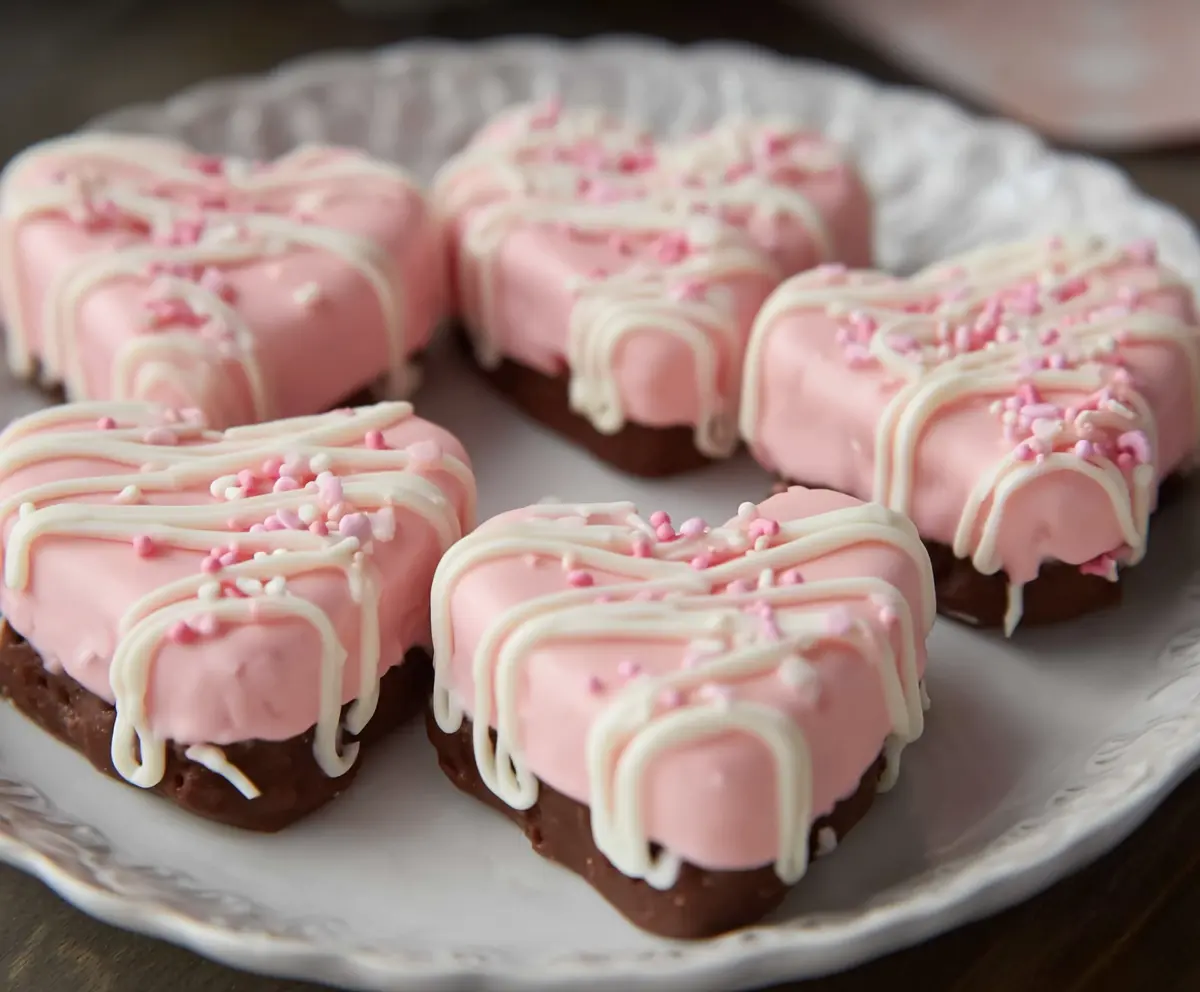
These Copycat Little Debbie Valentines Cakes are a fun and festive treat that brings back all the sweet memories of those heart-shaped cakes with the pink and red icing. They have that soft, fluffy cake texture layered with a creamy, dreamy filling, and they’re topped off with adorable heart decorations that make them perfect for Valentine’s Day or anytime you want to share a little love through dessert.
I love making these cakes because they’re such a cheerful way to brighten up any dessert table or lunchbox. Plus, it’s really satisfying to recreate a nostalgic favorite right at home. One tip I always use is to chill the cakes before frosting—it makes the icing go on smoother and helps the cakes stay nice and fresh for a few days.
My favorite thing about these Valentines Cakes is how they bring people together. I’ve shared them with friends, family, and even neighbors, and everyone always lights up when they see those cute heart shapes and colors. They’re perfect with a cup of coffee or just as a sweet little pick-me-up anytime you need a smile.
Key Ingredients & Substitutions
Cocoa Powder: Use unsweetened cocoa for a rich chocolate flavor. If you don’t have it, Dutch-processed cocoa also works but may change the cake’s texture slightly.
Butter for Filling: Softened unsalted butter is best for a smooth filling. Margarine or vegan butter can be substituted if needed, but flavor may differ.
White Chocolate Chips or Candy Melts: Both work well for coating. Candy melts are easier to color and melt smoothly; white chocolate offers a deeper flavor but watch carefully to avoid burning.
Pink Gel Food Coloring: Gel colors won’t thin your chocolate coating like liquid colors might. If unavailable, a small amount of liquid food coloring can be used, but be gentle to keep the coating thick.
How Do You Get Smooth, Even Coating on These Valentines Cakes?
Coating the cakes evenly and cleanly is key to that pretty, professional look.
- Melt the chocolate or candy melts gently in short bursts in the microwave. Stir well each time to avoid burning.
- Dip the cake slowly, covering all sides. A spatula can help spread coating evenly if dipping is tricky.
- Place dipped cakes on parchment or wax paper upright to let excess drip off, then chill quickly to set the coating.
- For decorations, add sprinkles immediately before the coating sets, and drizzle melted white chocolate with a small bag or spoon.
Chilling the cakes before coating helps them hold their shape and keeps the coating from melting or sliding off. Take your time, and don’t rush cooling or dipping steps for best results.
Equipment You’ll Need
- Heart-shaped cookie cutter – makes it easy to get the signature Valentine shape every time.
- 8-inch square baking pan – just the right size for baking the cake base evenly.
- Mixing bowls – for combining dry and wet ingredients separately.
- Electric mixer or hand whisk – helps get the filling light and fluffy.
- Microwave-safe bowls – perfect for melting chocolate and candy melts in short bursts.
- Parchment paper – keeps the cakes from sticking and makes cleanup simple.
- Small piping bag or zip-top bag – great for drizzling white chocolate decorations.
Flavor Variations & Add-Ins
- Swap the chocolate cake for red velvet for a classic Valentine’s twist and vibrant color.
- Add a layer of raspberry jam with the filling for a fruity contrast that pairs well with chocolate.
- Use white chocolate chips for the bottom coating instead of dark chocolate for a sweeter finish.
- Mix a pinch of cinnamon or espresso powder into the batter to deepen the chocolate flavor.
Copycat Little Debbie Valentines Cakes
Ingredients You’ll Need:
For The Chocolate Cake Base:
- 1 cup all-purpose flour
- 1/3 cup unsweetened cocoa powder
- 3/4 teaspoon baking powder
- 1/4 teaspoon baking soda
- 1/4 teaspoon salt
- 1/2 cup granulated sugar
- 1/2 cup whole milk
- 1/4 cup vegetable oil
- 1 large egg
- 1 teaspoon vanilla extract
For The Filling:
- 1/4 cup unsalted butter, softened
- 1 cup powdered sugar
- 2 tablespoons milk
- 1/4 teaspoon vanilla extract
For The Pink Coating:
- 2 cups white chocolate chips or candy melts
- Pink gel food coloring (if using white chocolate)
For The Chocolate Bottom Coating:
- 1 cup semi-sweet chocolate chips or milk chocolate candy melts
For The Decoration:
- White chocolate or white candy melts, melted (for drizzling)
- Pink and white Valentine’s Day sprinkles
How Much Time Will You Need?
This recipe takes about 45 minutes of active prep and baking time, plus extra chilling time of around 1 to 2 hours to set the filling and coatings perfectly. Plan ahead to let your cakes chill between steps for the best texture and ease when decorating.
Step-by-Step Instructions:
1. Make the Chocolate Cake Base:
Preheat your oven to 350°F (175°C) and line an 8-inch square pan with parchment paper. In one bowl, sift together the flour, cocoa powder, baking powder, baking soda, and salt. In another large bowl, whisk together sugar, milk, vegetable oil, egg, and vanilla extract until smooth. Slowly add the dry ingredients to the wet mixture and stir until just combined. Pour the batter into your pan and bake for 20 to 22 minutes, or until a toothpick comes out clean. Allow the cake to cool completely in the pan before moving forward.
2. Prepare the Filling:
Using a mixer or a whisk, beat the softened butter until creamy. Gradually add the powdered sugar, milk, and vanilla extract, mixing until fluffy and smooth. If the filling seems too thick to spread, add a bit more milk; if too thin, add a little more powdered sugar.
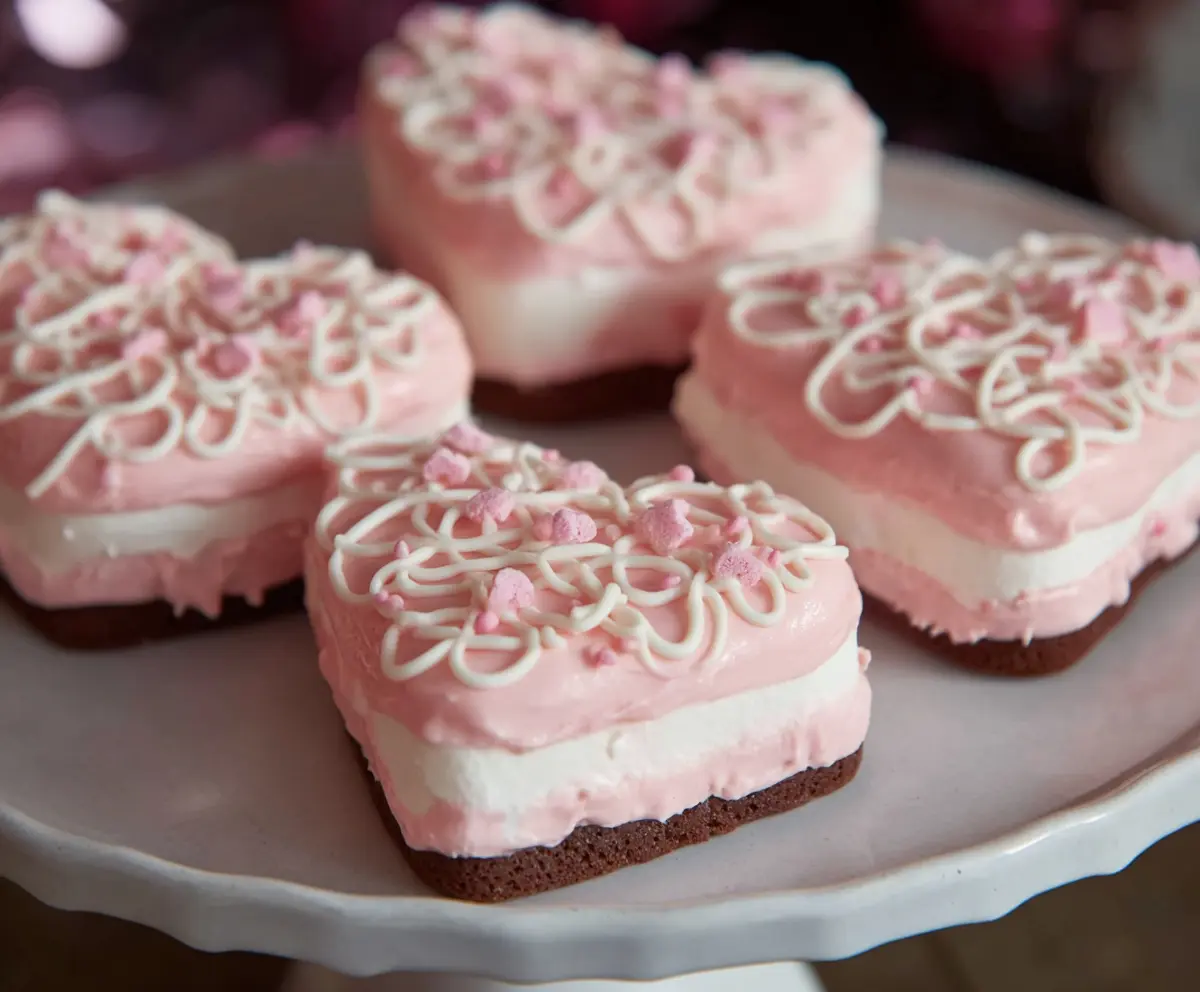
3. Assemble the Cake Layers:
After the cake has cooled, use a heart-shaped cookie cutter to cut out heart shapes. Spread a layer of the filling on half of the cake hearts, then gently sandwich with remaining hearts to create mini filled cakes. Arrange these on parchment-lined trays and chill for 30 minutes to firm them up.
4. Coat the Base with Chocolate:
Melt the semi-sweet or milk chocolate chips in the microwave, heating in 30-second bursts and stirring until smooth. Dip or spread melted chocolate over the bottom side of each heart cake. Place the coated cakes back on parchment and chill again until the chocolate is firm.
5. Coat the Hearts with Pink Chocolate:
Melt white chocolate or candy melts using the same microwave method. Add pink gel food coloring and stir until fully blended. Dip or coat the tops and sides of the heart cakes evenly with the pink chocolate. Set them upright on parchment paper so the coating sets nicely.
6. Decorate:
Before the pink coating sets, sprinkle pink and white Valentine’s Day sprinkles on top. Use melted white chocolate in a piping or zip-top bag with a small tip to drizzle lines over each cake for a pretty finishing touch. Chill again until fully set.
7. Serve and Enjoy:
Let your cakes sit for a few minutes at room temperature before serving for the best texture and flavor. Store any leftovers in an airtight container in the refrigerator to keep them fresh.
Can I Use Frozen Cake or Store-Bought Cakes for These Valentines Cakes?
Yes! If using frozen cake, make sure it’s completely thawed and chilled before cutting and assembling. Store-bought chocolate sheet cakes or brownies can also work well—just slice into heart shapes and proceed with filling and coating as usual.
How Should I Store Leftover Valentines Cakes?
Store leftover cakes in an airtight container in the refrigerator for up to 4 days. Bring them to room temperature for about 10–15 minutes before serving to soften the filling and improve flavor.
Can I Substitute the Pink Coating with Another Color or Type?
Absolutely! You can use any color of candy melts or white chocolate tinted with gel food coloring to match any occasion. For a natural dye option, try beet powder mixed into melted white chocolate.
What’s the Best Way to Get Smooth, Even Chocolate Coating?
Melting your chocolate or candy melts slowly in short bursts and stirring well helps prevent burning and clumps. Dip the cakes slowly and let excess drip off before setting them upright. Chilling the cakes before dipping also helps the coating stick nicely.