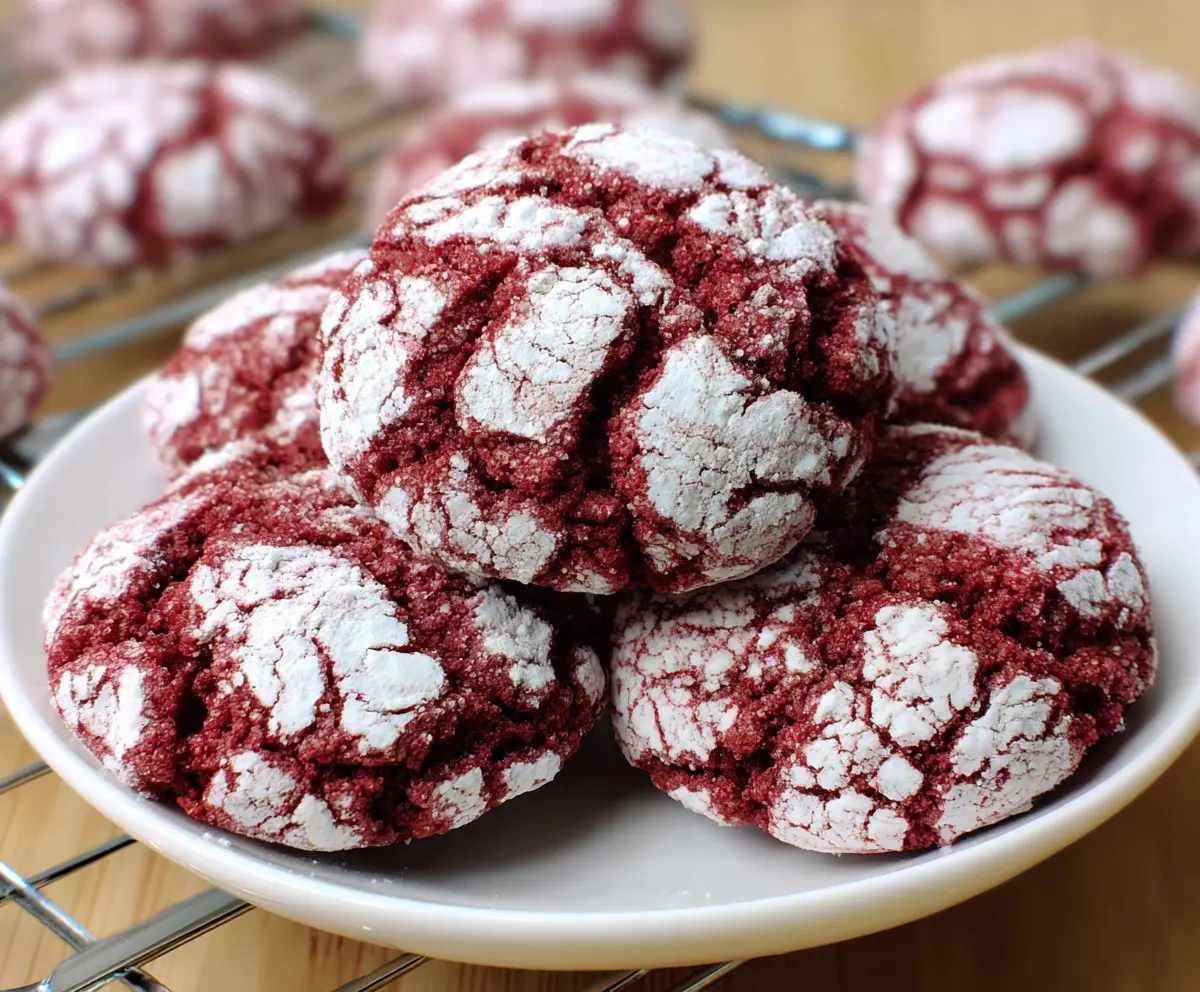
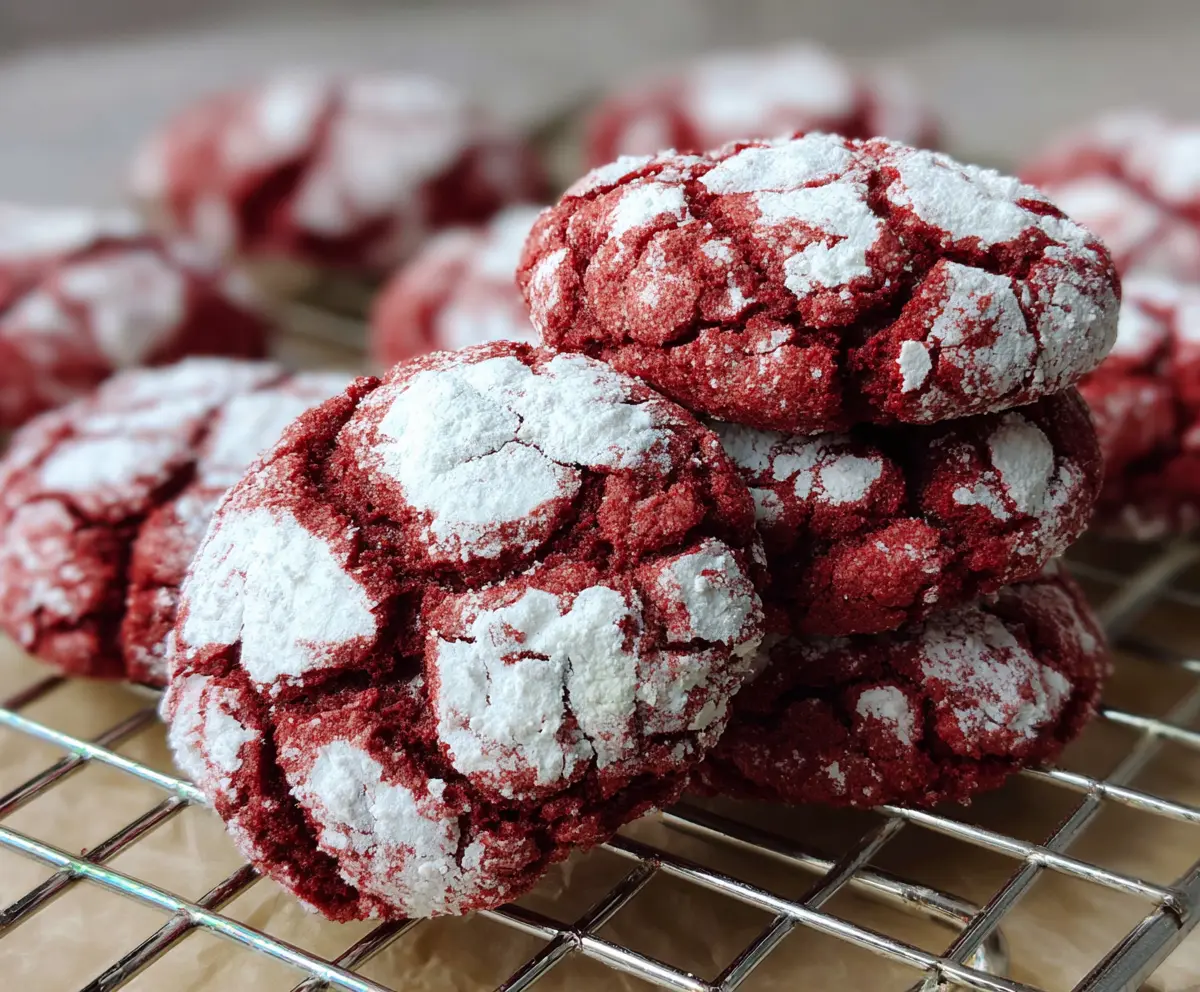
Red Velvet Crinkle Cookies are a festive and fun treat that’s perfect for any occasion. These cookies stand out with their vibrant red color and that delightful crinkled surface dusted in powdered sugar. They’re soft, chewy, and have just a hint of cocoa, giving them a sweet and slightly chocolatey taste that’s simple but so satisfying.
I love making these cookies when I want something eye-catching and easy to share. The crinkle effect is always a hit with family and friends—it feels like a little bit of magic when the powdered sugar cracks just right while baking. Plus, these cookies freeze well, so I often make a big batch ahead of time and have them ready whenever I need a quick homemade treat.
Serving these with a glass of cold milk or a warm cup of coffee makes them even better. I’ve found they’re great for holiday parties, cookie swaps, or just as a sweet surprise in lunchboxes. If you want to mix things up, I sometimes add a touch of cinnamon or a handful of chocolate chips to the dough for an extra layer of flavor.
Key Ingredients & Substitutions
Butter: Using softened unsalted butter helps create a tender and rich cookie. If you’re short on butter, you can try margarine, but the flavor won’t be quite the same.
Red Food Coloring: This gives the cookies their classic red velvet color. If you prefer natural options, beet juice powder or powdered freeze-dried strawberries can work, though the color may be less intense.
Cocoa Powder: Unsweetened cocoa adds just a hint of chocolate flavor. Dutch-processed cocoa works best for a smoother taste, but natural cocoa powder is fine too.
Powdered Sugar: Rolling the dough balls in powdered sugar creates the signature crinkled look when baked. Make sure to coat them generously for a bold pattern.
How Do You Get the Perfect Crinkle Texture on These Cookies?
The secret lies in how you prepare and bake the dough. First, chilling the dough firms it up, making it easier to roll into balls and preventing the cookies from spreading too much.
- After chilling, scoop dough into uniform balls for even baking.
- Roll each ball generously in powdered sugar—don’t be shy! This forms a coating that cracks attractively during baking.
- Space the cookies well on the tray so they don’t merge together as they expand.
- Bake just until the edges set but the center is still soft to keep the chewy texture inside.
Following these steps gives you the classic cracked surface that makes red velvet crinkle cookies so appealing.
Equipment You’ll Need
- Mixing bowls – use at least two for wet and dry ingredients; it keeps things organized.
- Electric mixer or hand whisk – makes creaming butter and sugar easier and smooth.
- Baking sheet – a flat, rimmed tray to bake the cookies evenly.
- Parchment paper or silicone baking mat – stops cookies from sticking and helps with easy cleanup.
- Cookie scoop or tablespoon – for uniform cookie sizes and even baking.
- Wire rack – lets cookies cool evenly without getting soggy underneath.
Flavor Variations & Add-Ins
- Try adding mini white chocolate chips for a sweet contrast that pairs well with red velvet.
- Mix in a teaspoon of cinnamon or nutmeg for a warm, spiced twist perfect during fall or winter.
- Swap red food coloring for natural beet powder for a more natural color and a subtle earthy flavor.
- Stir in chopped pecans or walnuts for crunch and a nutty touch that complements the soft cookie.
How to Make Red Velvet Crinkle Cookies?
Ingredients You’ll Need:
- 1/2 cup (115g) unsalted butter, softened
- 3/4 cup (150g) granulated sugar
- 1 large egg
- 1 tablespoon red food coloring
- 1 teaspoon vanilla extract
- 1 cup (125g) all-purpose flour
- 2 tablespoons unsweetened cocoa powder
- 1/2 teaspoon baking powder
- 1/4 teaspoon salt
- 1/2 cup powdered sugar (for rolling)
How Much Time Will You Need?
This recipe takes about 15 minutes of preparation, then 30 minutes of chilling time for the dough. Baking takes 10-12 minutes per batch. Altogether, plan for about 1 hour from start to finish, including cooling time.
Step-by-Step Instructions:
1. Preparing the Dough:
First, preheat your oven to 350°F (175°C) and line a baking sheet with parchment paper or a silicone mat. In a large bowl, cream the softened butter and granulated sugar until light and fluffy. Mix in the egg, red food coloring, and vanilla extract until everything is smooth and well combined.
2. Mixing Dry Ingredients and Combining:
In a separate bowl, whisk together the flour, cocoa powder, baking powder, and salt. Gradually add these dry ingredients to the wet mixture and stir until a soft dough forms. Avoid overmixing to keep the cookies tender.
3. Chilling the Dough:
Cover the dough and chill it in the refrigerator for at least 30 minutes. This helps the dough firm up, making it easier to handle and helping the cookies keep their shape while baking.
4. Rolling and Coating:
Once chilled, scoop tablespoon-sized portions of dough and roll each into a ball. Roll the balls generously in powdered sugar to coat them well. This sugar coating is key to getting the classic crinkled look.
5. Baking the Cookies:
Place the coated dough balls about 2 inches apart on the prepared baking sheet. Bake for 10-12 minutes until the cookies have set and their surfaces are nicely crinkled, but the centers remain soft.
6. Cooling and Serving:
Remove the cookies from the oven and allow them to cool on the baking sheet for 5 minutes. Then transfer to a wire rack to cool completely. Enjoy these soft, chewy, and vibrant red velvet crinkle cookies with your favorite beverage!
Can I Use Gel Food Coloring Instead of Liquid?
Yes! Gel food coloring works great and usually requires less quantity since it’s more concentrated. Start with about half a teaspoon and add more if you want a deeper red color.
Can I Make the Dough Ahead of Time?
Absolutely! You can prepare the dough and refrigerate it for up to 24 hours before baking. Just make sure to bring it back to a slightly firm but scoopable texture before rolling and coating in powdered sugar.
How Should I Store Leftover Cookies?
Store leftover cookies in an airtight container at room temperature for up to 3 days to keep them soft. For longer storage, freeze the baked cookies in a sealed bag or container for up to 2 months.
What If I Don’t Have Unsweetened Cocoa Powder?
If you don’t have cocoa powder, you can omit it, but the cookies will lose their subtle chocolate flavor. Adding even a tablespoon of melted chocolate or using chocolate-flavored baking cocoa can be a good substitute.