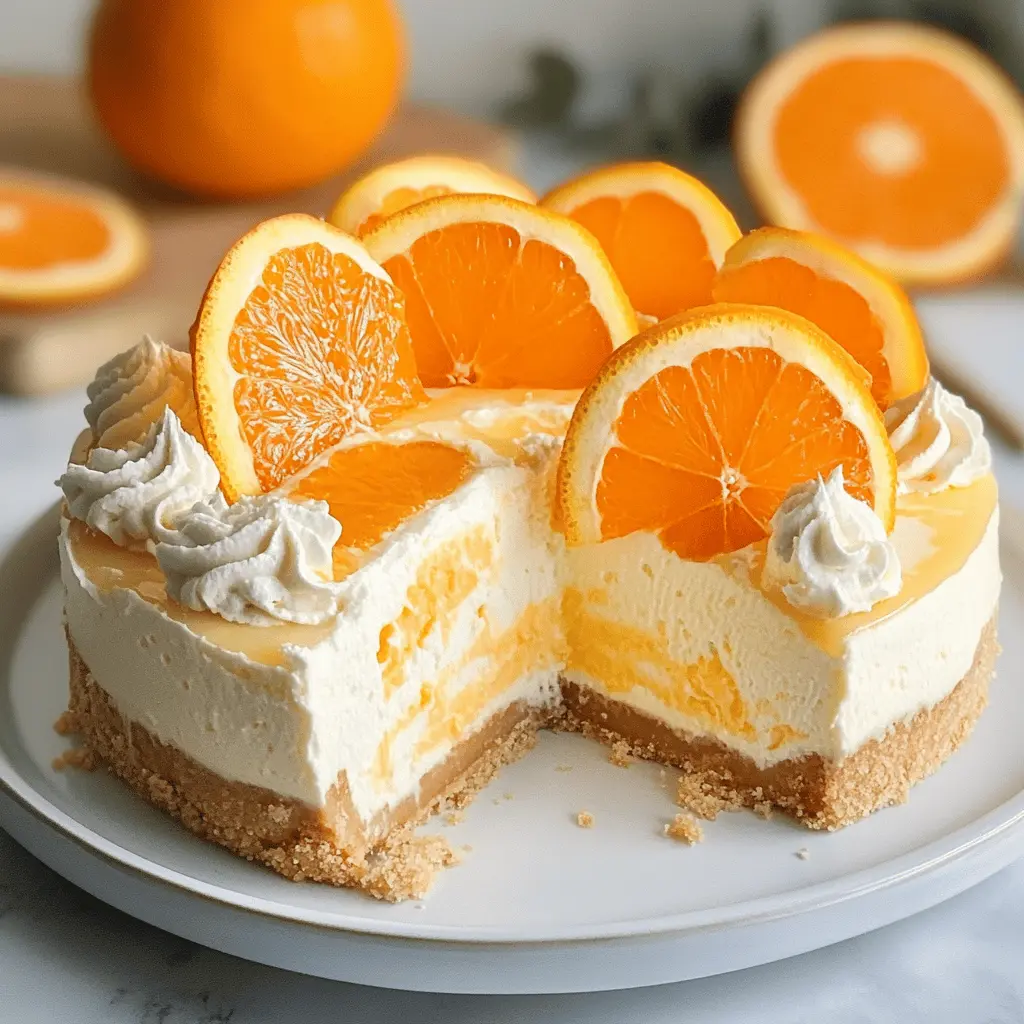
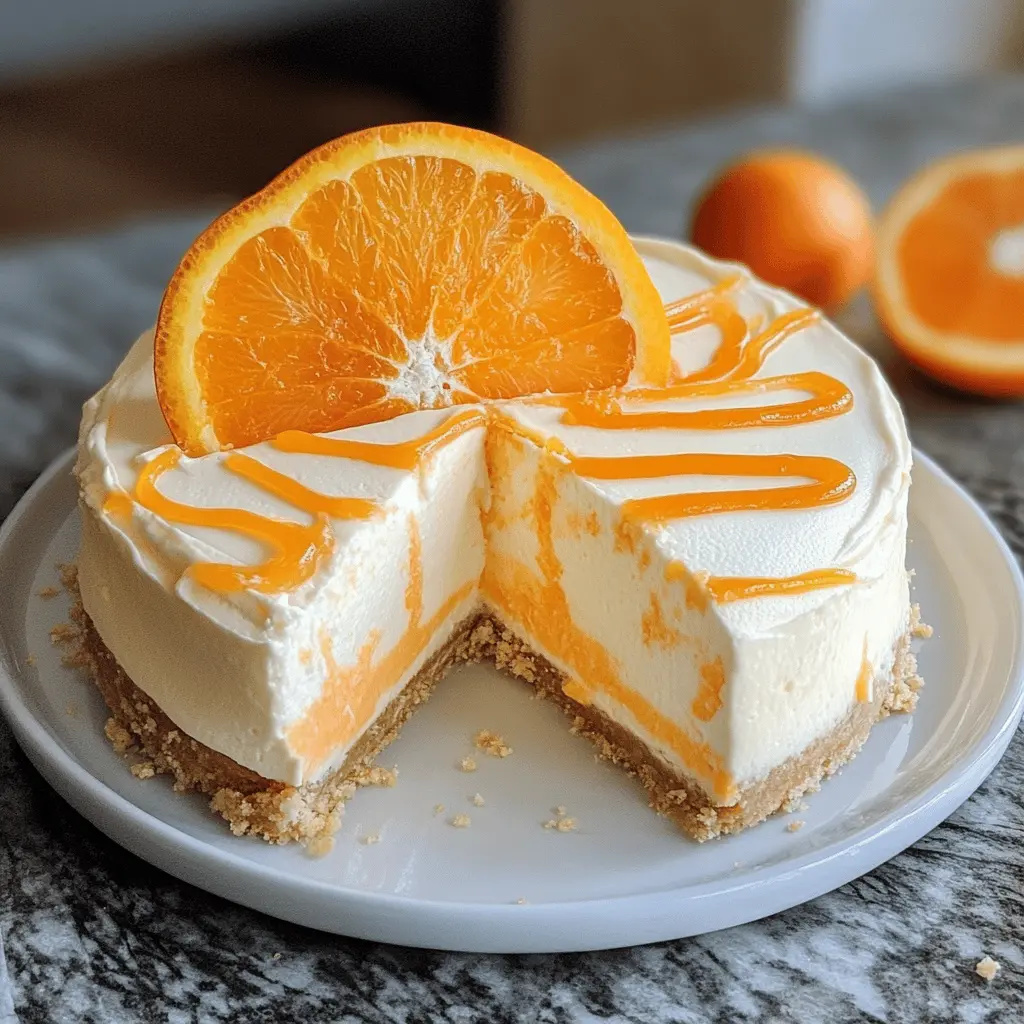
This No-bake Orange Creamsicle Cheesecake is super refreshing and creamy, bringing the taste of summer right to your kitchen! With a yummy orange flavor and a crunchy crust, it’s hard to resist.
Key Ingredients & Substitutions
Graham cracker crumbs: These are key for the crust. If you don’t have graham crackers, try using digestive biscuits or vanilla wafers for a similar texture and flavor.
Cream cheese: It’s crucial for the cheesecake’s creamy texture. If you’re looking for a lighter option, you can use Greek yogurt or low-fat cream cheese. Just keep in mind it might alter the flavor a bit.
Heavy whipping cream: This adds fluffiness to the cheesecake. If you want a lower-fat version, use a whipped topping instead, although it won’t have the same richness.
Orange juice: Freshly squeezed juice gives the best flavor. You can use bottled juice, but avoid anything with added sugar. You could also use other citrus juices like lemon or lime for a different twist.
Orange gelatin powder: This adds color and flavor. If you want to skip gelatin, try using cornstarch mixed with a bit of water as a thickener, but the end texture might change slightly.
How Do You Make Sure Your Cheesecake Sets Properly?
To get a perfect no-bake cheesecake, chilling is key! Here are some tips to help you:
- After mixing your filling, make sure to chill the crust before pouring in the filling. This helps keep it firm.
- Use an electric mixer to blend the cream cheese until it’s completely smooth. No lumps mean a creamier texture!
- When you whip the cream, ensure it reaches stiff peaks. This adds airy volume to the cheesecake – but be gentle when folding it into the cream cheese mixture to maintain that fluffiness.
- Let the cheesecake rest in the fridge for at least 4 hours, but ideally overnight, for the best results. Patience pays off!
How to Make No-Bake Orange Creamsicle Cheesecake
Ingredients You’ll Need:
For the Crust:
- 1 1/2 cups graham cracker crumbs
- 1/3 cup granulated sugar
- 1/2 cup unsalted butter, melted
For the Cream Cheese Filling:
- 16 oz cream cheese, softened
- 1 cup powdered sugar
- 1 teaspoon vanilla extract
- 1 1/2 cups heavy whipping cream
- 1/2 cup orange juice (freshly squeezed for best flavor)
- Zest of 1 orange
- 1/4 cup orange gelatin powder (such as Jell-O)
For Garnish:
- Orange slices
- Whipped cream
How Much Time Will You Need?
This no-bake cheesecake takes about 20 minutes to prepare and needs at least 4 hours to chill in the refrigerator to set properly. So, set aside some time, and you’ll have a delightful dessert ready to impress your friends and family!
Step-by-Step Instructions:
1. Prepare the Crust:
In a medium bowl, combine the graham cracker crumbs, granulated sugar, and melted butter. Mix everything together until it’s all wet and crumbly. Then, press the mixture firmly into the bottom of a 9-inch springform pan to create your crust. Put it in the refrigerator while you make the filling, so it firms up nicely.
2. Make the Cream Cheese Filling:
In a large mixing bowl, add the softened cream cheese and beat it with an electric mixer until it’s smooth and creamy. Gradually add in the powdered sugar and vanilla extract, mixing well until everything is nicely combined and creamy.
3. Whip the Cream:
In another bowl, pour in the heavy cream. Use an electric mixer to whip it until stiff peaks form. This means when you lift the beaters out, the cream holds its shape. Gently fold the whipped cream into the cream cheese mixture, being careful not to deflate the fluffy texture.
4. Mix in the Orange Flavor:
Now, divide the filling between two separate bowls. In one bowl, add the freshly squeezed orange juice, orange zest, and the orange gelatin powder. Stir this mixture until the gelatin is fully dissolved and the mixture is smooth and well combined.
5. Layer the Cheesecake:
Take the crust out of the fridge and pour half of the plain cream cheese mixture into it. Then, pour in the orange mixture, spreading it evenly. Top this with the remaining plain cream cheese mixture. If you like, use a knife to gently swirl the layers for a pretty marbled effect!
6. Chill and Set:
Cover the cheesecake with plastic wrap and place it in the refrigerator. Let it chill for at least 4 hours, allowing it to set up perfectly.
7. Garnish and Serve:
Once the cheesecake is set, carefully remove it from the springform pan. Top with dollops of whipped cream and garnish with orange slices for a lovely finish. Slice it up and enjoy your delicious No-Bake Orange Creamsicle Cheesecake!
Can I Use a Different Type of Crust?
Absolutely! While graham cracker crust is classic, you can substitute it with a crushed Oreo cookie crust or use gingersnap cookies for a spicy twist. Just remember to adjust the amount of sugar in the crust if your alternative is sweeter!
Can I Substitute the Cream Cheese?
If you’re looking for a lighter option, you can use Greek yogurt or mascarpone cheese in place of cream cheese. The texture will be slightly different, but they’ll still provide a creamy finish. Make sure to blend well for the best results!
How Long Can I Store Leftovers?
You can store leftover cheesecake in an airtight container in the refrigerator for up to 5 days. For longer storage, consider freezing individual slices wrapped tightly in plastic wrap and foil; they can be frozen for up to 2 months!
Can I Make This Recipe Without Gelatin?
Yes! If you’d prefer not to use gelatin, you can replace it with 2 tablespoons of cornstarch mixed with a little cold water to create a slurry. Stir it into the orange juice mixture before combining it with the cream cheese. It won’t set quite as firmly, but it will still taste delicious!